
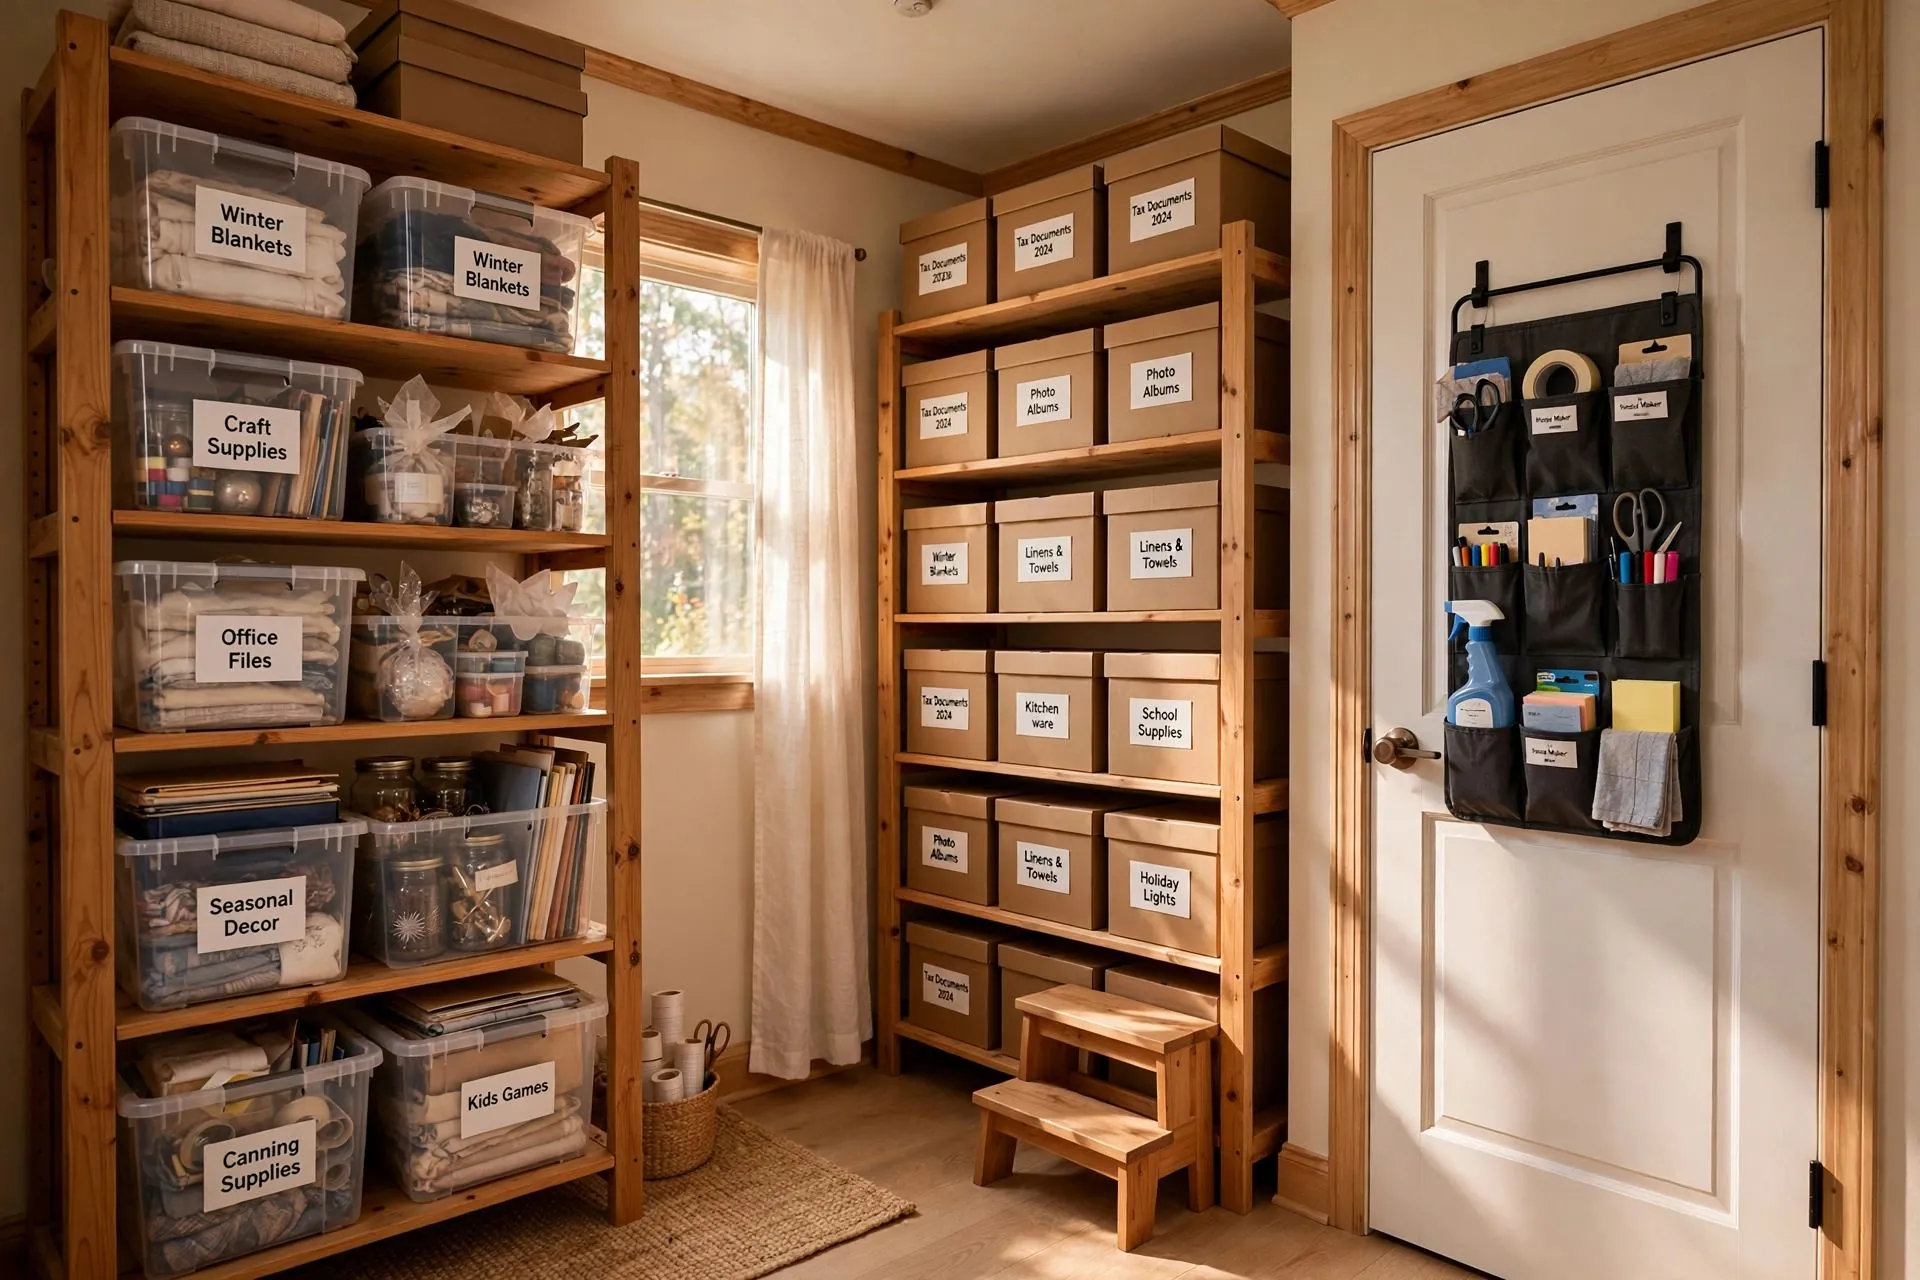
Somewhere in your apartment there is a small room with no real job. It was called a “den” on the listing, and right now it’s probably holding a chair nobody sits in, boxes you never opened, and everything that had nowhere else to go. That little room is the most underused storage space in your home — and turning it into proper storage can declutter every other room you own.
This guide shows exactly how to turn a den into storage: what to store there, how to lay it out in zones, the shelving and container setup that works, and how to do it all in a weekend — renters included.
✅ In the next 5 minutes, here’s exactly what you’ll get:
- A 7-step plan to turn a den into storage in one weekend
- A zone layout — exactly what goes where in the room, and why
- Real budget options — from around $50 to a full setup
- 100% reversible — freestanding furniture only, so renters can do every step
📑 What’s in This Guide
The Short Answer
To turn a den into storage: empty the room completely, sort everything into categories, and put back only what belongs there — arranged in zones along the walls, using tall freestanding shelving, clear labeled containers, and the back of the door. Keep daily items near the door and seasonal items deepest in the room. A basic setup costs about $50–100 and takes one weekend.
Why Turn a Den Into Storage?
Most small apartments don’t lack space — they lack a storage room. The vacuum cleaner lives in the hallway, suitcases eat the closet, and seasonal decorations colonize the bedroom. A den is typically 60–100 square feet, which is roughly the size of a small storage unit people pay $60–120 a month for. Converting yours gives every homeless item in your apartment one contained home, and it follows the same system behind how to organize small spaces: every category gets one home, stored by how often you use it.
Before You Start: 3 Questions
1. What will actually live here? Make the list first — seasonal clothes, holiday decorations, luggage, cleaning supplies, hobby gear, paperwork, bulk buys. The list decides the layout, not the other way around.
2. Full storage room, or hybrid? A full conversion makes the whole den storage. A hybrid keeps one corner usable — a reading chair, a small desk — and turns the walls into storage. If you work from home even one day a week, choose hybrid.
3. Renting or owning? Renters: freestanding units only, nothing drilled. Owners can consider built-ins later, but the freestanding version in this guide works just as well and stays reversible.
Turn a Den Into Storage in 7 Steps
Step 1: Empty the Room Completely
Everything out — yes, everything. A den you “organize” around existing piles stays a junk room. Sort what comes out into three piles: belongs in the den, belongs somewhere else, and gone (donate, sell, recycle). Most dens shrink by a third at this step alone.
Step 2: Plan Your Zones on Paper
Sketch the room and assign each wall or corner a category before anything goes back in. Zones keep categories from bleeding into each other — the exact layout is in the table below, but the rule is simple: heavy and rarely used at the back, light and frequent near the door.
Step 3: Go Vertical With Freestanding Shelving
One tall shelf unit (about 72 inches) along the longest wall is the backbone of the whole conversion. Dens are small, so floor space is precious — the walls do the heavy lifting. Two units if your list demands it, never more: if it doesn’t fit on the shelves, it doesn’t belong in the den.
Step 4: Containers Before Loose Items
Nothing goes on a shelf loose. Clear bins for things you need to identify at a glance, lidded boxes for things you want visually calm, and labels on everything — your future self, hunting for the holiday lights in December, will thank you. Uniform containers stack better and make the room feel like a system instead of a pile.
Step 5: Use the Door and the Corners
The back of the den door is five square feet of free storage: an over-the-door organizer or hooks handle gift wrap, cleaning tools, or cables. Corners take the tall, awkward items — the vacuum, the ironing board, the rolled-up rug — standing upright instead of leaning across a wall.

Step 6: Arrange by Frequency
Eye-level shelves near the door: things you grab monthly. Top shelves and the back of the room: seasonal and yearly items. The floor: only the heaviest boxes. This single arrangement rule is the difference between a storage room you use and a storage room you avoid.
Step 7: Set the One-Rule Maintenance Habit
A storage den stays a system with one rule: nothing enters without a labeled home, and when a category outgrows its bin, something leaves. A 10-minute check each season keeps it that way — check out our guide to the best storage solutions for small apartments for the bins, racks, and organizers that work best in rooms like this.
The Den Storage Zone Layout
Use this layout as your starting map — adjust the categories to your own list from Step 2.
| Zone | What Lives There | Best Container |
|---|---|---|
| By the door (eye level) | Cleaning supplies, tools, everyday overflow | Open bins + door organizer |
| Long wall (shelving) | Labeled category boxes: paperwork, hobby gear, electronics | Uniform lidded boxes |
| Top shelves | Seasonal: holiday decor, winter gear | Clear bins (see contents fast) |
| Corners (standing) | Vacuum, ironing board, luggage | None — upright, hooks on wall side |
| Floor (back of room) | Heaviest boxes: books, archives | Sturdy stackable boxes |
What It Costs: 3 Budget Levels
Basic (~$50–100): One tall shelving unit plus a set of clear bins and labels. Covers most apartments — this is where to start.
Mid-range (~$150–250): Two shelving units, matching lidded boxes, an over-the-door organizer, and a small step stool for the top shelves. The “looks like a real storage room” tier.
Full setup ($400+): Adds a work surface for sorting and packing, a rolling cart for the hybrid corner, and uniform premium containers throughout. Worth it only if the den is your home’s main storage. For more ideas on stretching a small-space budget, The Spruce’s small apartment storage ideas are a useful browse.

5 Mistakes to Avoid
1. Skipping the empty-out. Sorting around existing piles just rearranges the junk room.
2. No zones. Without zones, “storage den” becomes “room where things go to be forgotten.”
3. Buying containers before measuring. Measure the shelves first; a bin that’s half an inch too wide is a wasted bin.
4. Blocking the door swing or the window. A storage room you can’t fully enter — or that traps moisture behind blocked airflow — creates new problems.
5. Storing the wrong things. Important documents, photos, leather, and long-term electronics don’t belong in a room with temperature swings (see the FAQ below).
Frequently Asked Questions
What is a den in an apartment?
A den is a small extra room in an apartment or house that is too small — or lacks a closet or window — to count as a bedroom. Dens are usually 60–100 square feet and are used as a home office, reading nook, guest space, or, very often, wasted space that slowly fills with random clutter.
Can I turn my den into a storage room if I rent?
Yes, as long as you use freestanding shelving and furniture instead of drilling built-ins. A rental-friendly den conversion uses standalone shelf units, bins, and over-door storage that all leave with you on moving day, with zero damage to walls.
What should not be stored in a den?
Avoid storing anything sensitive to temperature or humidity swings if your den runs hot or damp, like important paper documents, photos, leather goods, and electronics long-term. Food items that attract pests and anything flammable should also stay out of a den storage setup.
How much does it cost to turn a den into storage?
A basic conversion using bins and one shelving unit costs around $50–100. A mid-range setup with two tall shelf units, matching containers, and labels runs roughly $150–250. A full storage-room setup with multiple units and a work surface can reach $400+, but most apartments get everything they need from the basic or mid-range tier.
Does turning a den into a storage room hurt home value?
Not if the conversion is reversible. Freestanding shelving and bins change nothing about the room itself, so the den can go back to an office or guest room in an afternoon. Permanent built-ins are the only version that could affect how a future buyer sees the room.
Affiliate Disclosure: As an Amazon Associate, I earn from qualifying purchases made through links on this site, at no extra cost to you. This guide covers the system; product picks live in our linked guides.